
Welcome to the Honeywell 4000 Installation Manual, your guide to successfully installing and configuring the Honeywell Pro 4000 thermostat. This manual provides step-by-step instructions, troubleshooting tips, and essential information to ensure a smooth setup process.

System Components and Compatibility
The Honeywell 4000 system is compatible with standard HVAC systems, including heat pumps and dual-stage heating. It requires a 24VAC power supply and proper wiring connections for optimal performance.
2.1. Overview of the Honeywell 4000 System
The Honeywell 4000 system is a versatile and efficient solution designed for various HVAC setups. It offers compatibility with heat pumps and dual-stage heating systems, ensuring optimal performance. With its user-friendly interface, it allows for easy temperature control and scheduling. The system requires a 24VAC power supply and proper wiring connections. Its design caters to different home configurations, providing reliable and consistent climate control. This overview sets the stage for understanding its components and installation process.
2.2. Compatibility with Different HVAC Systems
The Honeywell 4000 system is designed to work seamlessly with a variety of HVAC setups, including heat pumps, dual-stage heating, and cooling systems. It is compatible with both traditional and modern HVAC configurations, making it a versatile choice for different home environments. The system supports multi-stage operations, ensuring efficient temperature control. Its compatibility extends to smart home integrations, allowing for advanced automation and energy management. This flexibility makes it suitable for a wide range of heating and cooling needs.

Pre-Installation Requirements and Preparation
Ensure compatibility with your HVAC system, gather necessary tools, and prepare the installation site. Verify power requirements and safety guidelines before starting the installation process.
3.1. Checking Compatibility and System Requirements
Before installation, confirm that the Honeywell 4000 thermostat is compatible with your HVAC system. Check voltage requirements, ensuring a 24VAC power supply is available. Verify the system type, whether it’s a heat pump, gas furnace, or electric system. Also, ensure the thermostat’s wiring diagram matches your existing setup. This step is crucial to avoid installation issues and ensure proper functionality.
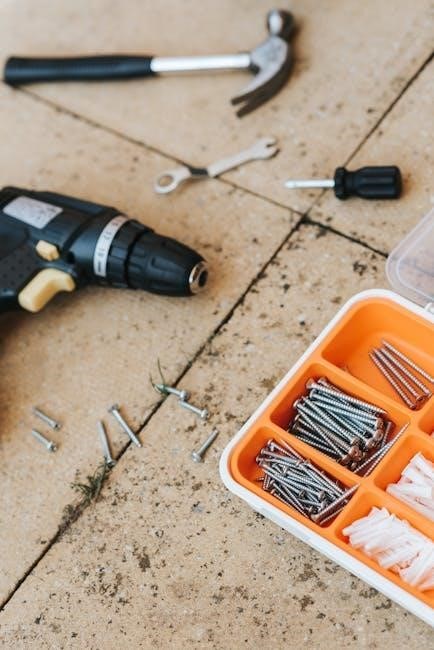
3.2. Gathering Necessary Tools and Materials
To begin, collect essential tools: a screwdriver, pliers, and wire strippers. Materials needed include the Honeywell 4000 thermostat, wall anchors, and batteries. Ensure you have a voltage tester for safety checks and a level for proper mounting. Optional items like extra wire or connectors may be useful. Organize all components beforehand to streamline the installation process and minimize delays. This preparation ensures a safe and efficient setup of your Honeywell 4000 thermostat.

Step-by-Step Installation Process
Begin by turning off power to your HVAC system. Remove the old thermostat and prepare the area for the Honeywell 4000 installation. Follow the detailed steps to ensure proper setup and functionality.
4.1. Mounting the Thermostat
Start by turning off the power to your HVAC system at the circuit breaker. Remove the old thermostat and take note of the wiring configuration. Use the provided wall anchors and screws to mount the Honeywell 4000 base plate to the wall, ensuring it is level and secure. Gently insert the thermostat into the base, aligning the connectors properly. Double-check the installation for stability and correct positioning before proceeding to wiring.
4.2. Wiring Connections and Diagrams
Refer to the wiring diagram in the manual to identify the correct terminals for your system. Ensure the power is off before connecting wires to avoid damage. Connect the R (red) wire to the R terminal and the C (common) wire to the C terminal. Securely attach the remaining wires to their corresponding terminals, such as W, Y, and G, based on your system type. Double-check all connections for accuracy and tighten the screws firmly. Turn the power back on and test the thermostat to confirm proper operation.
4.3. Configuring the System Settings
After wiring, access the configuration menu on the Honeywell 4000 thermostat. Set the current date and time to ensure schedules work correctly. Choose between Fahrenheit or Celsius and set temperature limits to avoid extreme settings. Navigate through the menu to configure heating and cooling stages, fan settings, and system operation modes. Review all settings to ensure they match your HVAC system requirements for optimal performance. Save your configurations to complete the setup process and test the system to confirm proper operation.
Post-Installation Configuration and Setup
After installation, program the Honeywell 4000 thermostat by setting schedules, temperature preferences, and system operation modes. Ensure all configurations align with your HVAC system for optimal performance.
5.1. Programming the Thermostat
Programming the Honeywell 4000 thermostat involves setting temperature schedules and preferences. Start by navigating to the menu, selecting the desired program type (e.g., heat, cool, or auto), and adjusting temperature ranges. Use the touchscreen interface to set daily schedules, ensuring optimal comfort and energy efficiency. If issues arise, reset the thermostat by removing batteries for 2 minutes, then reprogram. Proper programming ensures consistent performance and resolves temperature fluctuations.
5.2. Setting Up Schedules and Preferences
Setting up schedules and preferences on the Honeywell 4000 thermostat allows for personalized comfort and energy efficiency. Create daily temperature schedules by navigating to the menu and selecting specific times and desired temperatures. Use pre-set programs or customize based on your routine. Adjust preferences like temperature ranges and operation modes (heat, cool, or auto) to suit your lifestyle. Ensure the current day and time are programmed for accurate scheduling. Preview schedules before saving and adjust as needed for optimal performance.
Troubleshooting Common Installation Issues
Common issues during installation can often be resolved by checking the manual for solutions, such as resetting the device or verifying wiring connections for accuracy.
6.1. Addressing Temperature Fluctuations
If your Honeywell Pro 4000 thermostat displays fluctuating temperatures, ensure proper calibration by adjusting the temperature offset. Check wiring connections for stability and verify that the system is set to the correct mode (heating or cooling). Resetting the thermostat or replacing batteries may resolve minor issues. For persistent problems, consult the manual or contact Honeywell support for further assistance.
6.2. Resolving Wiring and Connectivity Problems
Ensure all wires are securely connected to the correct terminals on the Honeywell Pro 4000. Verify the R and C wires are properly installed for 24VAC power. Check for loose connections or damaged wires that may disrupt communication between components. Refer to the wiring diagrams in the manual for guidance. If issues persist, consider consulting a licensed HVAC technician to diagnose and repair any connectivity problems effectively.
Maintenance and Upkeep Tips
Regularly clean the Honeywell Pro 4000 thermostat to ensure optimal performance. Replace batteries as needed and calibrate the system annually for accurate temperature control and efficiency.
7.1. Cleaning and Calibrating the Thermostat
Cleaning the Honeywell Pro 4000 thermostat involves gently wiping the display and sensors with a soft cloth. Calibration ensures accurate temperature readings. Remove batteries, press and hold the reset button, then reinstall them to complete the calibration process. Regular maintenance prevents drift and ensures precise temperature control, optimizing HVAC performance and energy efficiency. Always refer to the manual for detailed calibration steps to avoid errors and maintain functionality. This ensures the thermostat operates reliably and efficiently, providing consistent comfort and energy savings.
7.2. Battery Replacement and Management
The Honeywell Pro 4000 thermostat typically uses AA alkaline batteries. Replace them every 12-18 months or when the low-battery indicator appears. To replace, remove the old batteries, insert the new ones ensuring correct polarity, and close the compartment. Proper battery management ensures uninterrupted operation and maintains programmability. Avoid mixing old and new batteries to prevent performance issues. Regular replacement prevents unexpected shutdowns and ensures consistent temperature control. Always test the thermostat after replacing batteries to confirm functionality. This simple maintenance step is crucial for reliable performance and energy efficiency.
Integration with Smart Home Systems
The Honeywell Pro 4000 thermostat seamlessly integrates with smart home systems, offering voice command functionality and remote access through compatible platforms. Users can control settings via apps, enhancing convenience and energy management. This integration allows for advanced automation and synchronization with other smart devices, ensuring a connected and efficient home environment. Proper setup requires a stable internet connection and compatibility with supported systems. Follow the manual for detailed pairing instructions to unlock full smart features.
8.1. Connecting to Wi-Fi and Smart Devices
To connect your Honeywell Pro 4000 thermostat to Wi-Fi, navigate to the device’s menu and select the Wi-Fi setup option. Choose your network from the available list and enter the password. Once connected, download the Honeywell Home app to control the thermostat remotely. Ensure your router is nearby and the network is stable for uninterrupted connectivity. Some models may require Bluetooth pairing during initial setup. Follow the app’s instructions to complete the integration and enjoy smart home automation features. Proper connection ensures seamless control and energy management.
8.2. Voice Command and Remote Access Setup
To enable voice command functionality, link your Honeywell 4000 thermostat with smart home platforms like Amazon Alexa or Google Assistant. Open the Honeywell Home app, navigate to the settings menu, and select “Voice Control” to initiate the integration. Ensure your device is connected to Wi-Fi for seamless communication. For remote access, log into the Honeywell Home app using your credentials to adjust settings, set schedules, or monitor your system from anywhere. This feature enhances convenience and energy efficiency, allowing you to manage your home’s climate effortlessly.
Warranty and Technical Support Information
Your Honeywell 4000 thermostat is backed by a limited warranty covering defects in materials and workmanship. For technical support, visit Honeywell’s official website or contact their customer service team for assistance with installation, troubleshooting, or repairs.
9.1. Understanding the Warranty Coverage
The Honeywell 4000 thermostat is protected by a limited warranty that covers manufacturing defects for a specified period. The warranty typically includes parts and labor under normal use conditions. For detailed terms, refer to the warranty documentation provided with your purchase. Proper installation and adherence to guidelines are essential to maintain coverage. Any unauthorized modifications or misuse may void the warranty. Contact Honeywell support for further clarification and claims assistance.
9.2. Contacting Honeywell Support
For assistance with your Honeywell 4000 thermostat, contact Honeywell support through their official website, phone, or email. Ensure you have your model number and serial number ready for efficient service. Honeywell also offers online resources, including FAQs and troubleshooting guides, to address common issues. Representatives are available to help with installation, warranty claims, and technical queries, ensuring your system operates at peak performance.
Safety Guidelines and Precautions
Always disconnect power before installation. Use appropriate tools and follow electrical safety measures. Handle the device carefully to avoid damage during transport or mounting.
10.1. Electrical Safety Measures
Ensure the power supply is turned off before starting installation to prevent electrical shocks. Verify compatibility with your system’s voltage requirements. Use insulated tools and avoid overloading circuits. Grounding must be properly done as per local regulations. Keep wires securely connected to prevent short circuits. Never touch electrical components with wet hands. If unsure, consult a licensed electrician. Always follow manufacturer guidelines for a safe and reliable setup.
10.2. Handling and Transporting the Device
Handle the Honeywell 4000 thermostat with care to avoid damage. Use protective packaging during transport to prevent scratches or shocks. Avoid exposing the device to extreme temperatures or moisture. Store it in a clean, dry environment when not in use. Ensure all components are securely packed to prevent movement during transport. Follow proper lifting techniques to avoid physical strain. Keep the device away from direct sunlight and ensure it remains upright to maintain internal components’ integrity.
The Honeywell 4000 installation manual provides comprehensive guidance for a successful setup. Proper installation ensures optimal performance and efficiency, adhering to all safety guidelines for reliable operation.
11.1. Summary of Key Installation Steps
Start by ensuring compatibility with your HVAC system and gathering necessary tools. Mount the thermostat securely, following wiring diagrams for precise connections. Configure system settings and program schedules according to your preferences. Test the thermostat to confirm functionality and adjust settings as needed. Proper installation ensures optimal performance, energy efficiency, and reliability. Always refer to the manual for specific instructions tailored to your setup.
11.2. Importance of Following the Manual
Adhering to the Honeywell 4000 manual ensures a safe and correct installation, preventing potential damage or safety hazards. Proper setup guarantees optimal performance, energy efficiency, and compatibility with your HVAC system. Following instructions minimizes errors and simplifies troubleshooting, while ensuring all features function as intended. Regular maintenance and configuration guidelines help maintain reliability and extend the product’s lifespan. Always refer to the manual for precise steps tailored to your system, ensuring a seamless and efficient installation process.